This is the very first post on our wonderful new site. Originally this post was going to be all about this site and the topics we plan on covering, etc. etc. but we figured that we already painted this picture on the About Us page and no one is really here to read about us and our website goals that are the same as 30 billion other bloggers out there…
So lets get straight into it. For the first post, we are going to discuss the “Art Of Bricklaying” since we had a recent and relevant experience with this.
We were invited to help out with a fencing job on a new property which part of required a retaining with the fence being built on top. We have done lots of retaining walls and in this instance the client wanted a brick retaining wall.
Now I will start off by pointing out that if your brick wall is going to be a prominent feature in your yard and this is your first time performing the “bricklaying art”, then you may want to either practice somewhere else first, or bit the bullet and get the professionals in, or a mate. As with all DIY projects, do your homework and research. Decide first if this is something within your capabilities and skillsets.
Preparation
All projects require preparation and a DIY bricklaying project is no exception. Plan ahead well and you should end up with a great looking wall.
Using builders string, layout the design of the wall. Measure up and provide the measurements to your brick supplier and ask them to work out how many bricks you need. It goes without saying to get 10 or so extra bricks to allow for mistakes.
Apart from the bricks you will also need the following items;
- Concrete for the foundation
- Lots of builders string
- Spirit level
- Measuring tape
- Mortar mix
- Rubber mallet
- Shovel
- Trowel
- Mixing bucket
- Wooden stakes and nails.
In preparations, don’t forget to consider the weather – you certainly don’t want to be laying bricks in the rain, your wall won’t hold up.
Foundation
You need to have a solid and level foundation to lay your bricks on. If the foundation is not level, you are going to have an odd looking brick wall. The foundation also needs to be strong so it can support the weight of the bricks.
If you are building your wall on bare ground, prepare your foundation by digging a trench that the bricks will go onto. The foundation must be level and be below the level of the ground so it will be out of site.
Guides
Setting up your guidelines is critical to getting that great looking wall (mostly so it will be level). You can do the measuring and setting up whilst your concrete footing is curing and settling.
Using a stake, measure out the height of each course of bricks that you are planning and take into account the height of the mortar. Setup a stake at each end of the wall and run your builders string in between for the first course. After you have setup the string, check it is level (you can use a string level for this – makes life so much easier).
Double and triple check your string guide is level – you will be using this to make sure your bricks are laid level.
After each course is laid, you will move the string guide up to the next level.
Dry Run
Layout the bricks for the first level without using mortal, i.e. a “dry run”. You’re doing this to get a visual that everything seems in order;
- Count the number of bricks used, is this within estimates?
- Does the course of bricks follow the string guide?
- Is it level by eye?
- Is it straight by eye?
- Is it clear of obstructions?
Once your happy, gather up the bricks. Hint – place small piles of bricks at intervals along your wall to give you easy access during the laying process.
Laying Your Bricks
Mix your mortar in your mixing bucket, be it a tub or a wheelbarrow, etc. Refer to the instructions on your mortar packet on how to mix the mortar. Follow the instructions exactly, weak mortar could result in a disaster for your wall.
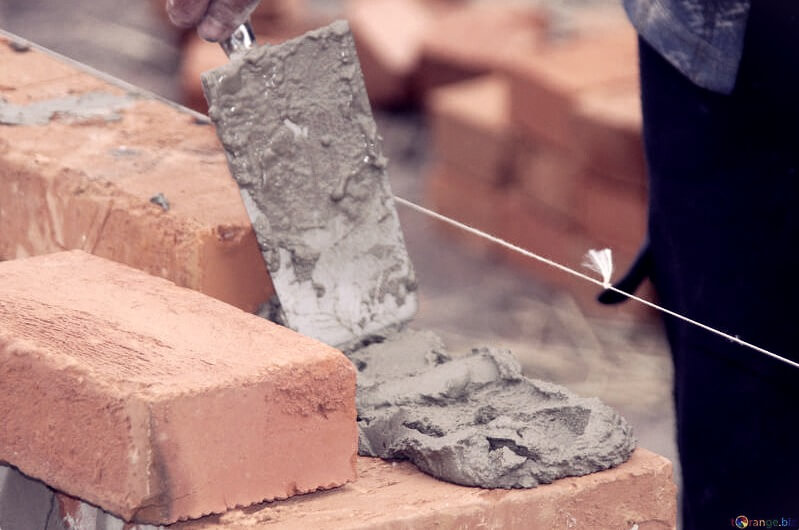
Using your trowel, scoop up some mortar and lay it down on the foundation. You want to make a bed of mortar around 4 – 6 inches wide, and around 1 inch thick. Make the length slightly longer than the brick.
Take the first brick and lay it on the bed of mortar, as close to the correct position as possible. Make final adjustments to the position with the handle of your trowel, tapping it into place. You want it to be parallel with the string and level with the string.
Using the trowel, lay a bed of mortar for your second brick. Take the second brick and using the trowel, scoop some mortar onto the end of your brick that will butt up against the first brick. Make it about 3/8″ thick.
Keep using your trowel to wipe off excess mortar and place it on the foundation for the next brick or back in the mixing tub.
Place your second brick down on the bed of mortar, and using the handle of your trowel, knock it level and straight against the guide string (just like the first brick) and tap the end of the brick to get it butting against the first brick.
Use your trowel (or your fingers) to scoop off excess mortar.
Repeat with another 5 or six bricks. At this point grab your spirit level and double check that the bricks are going down nice and level. You can make adjustments as necessary. Keep checking every 5 or 6 bricks.
Second Course
Once you have complete the first course, move your string guide up to the top of the second course (you should have marks on your stakes that you previously measured out). Again, double and triple check that you string is level and is running true to the first course.
Using your trowel, scoop up some mortar and lay it on top of the first course of bricks. Try for a wedge shape when applying the mortar, then using your trowel massage it out so there is a valley running along the middle of the mortar. This gives the brick an air pocket to sit on.
To give the wall strength, you need to stagger the bricks across the joins of the first course. Begin with a half brick which will result in the following bricks being staggered across the first row of bricks.
As with the first row of bricks, position the brick into place using the handle of your trowel until it is in the correct spot using your string guide.
Continue laying your bricks on top of the first course in the same manner as you did with the first course. You’ll need to finish off the course with the other half of the brick that you started with.
Repeat this process for the remaining courses. Remember to stop and check your work regularly. Adjustments can be made somewhat easily while the mortar is still wet. Make sure your bricks are keeping true to your guides and step back every so often to take a visual inspection.
Finishing Off
If you’re looking for that “professional finish”, use a jointer to finish off joints. Or you can use your finger.
Once the mortar has began to dry out, finish off the mortar joints by using a jointer or your finger to smooth them out.
You may want to use a stiff brush or a wet cloth to remove excess mortar from the brick face to clean it all up.
Depending on the size of your project, you may want to do this step in between courses before the mortar dries too much. For example, if you’re doing this over a couple of weekends, don’t wait until you have finished to tidy up the joints and clean the bricks. In fact you might want to do it as regularly as after each course. You’ll get the feel for it after you have done a few courses.
Photo Credit: https://torange.biz/building-bricks-2951